Some code is very repetitive. Extremely repetitive. Like writing properties for a class, printing to the debug output or adding a call to the logger.
This is boring stuff. The same code over and over again. Wouldn’t it be nice if there was an easier way to write this code? Make the machine do the boring work? That’s what they’re for, right?
Enter snippets
Snippets are a way to create short character sequences that Visual Studio will replace with code. You can also set parts of the code to be edited when being inserted. Visual Studio comes with some built in snippets that you can try out right away.
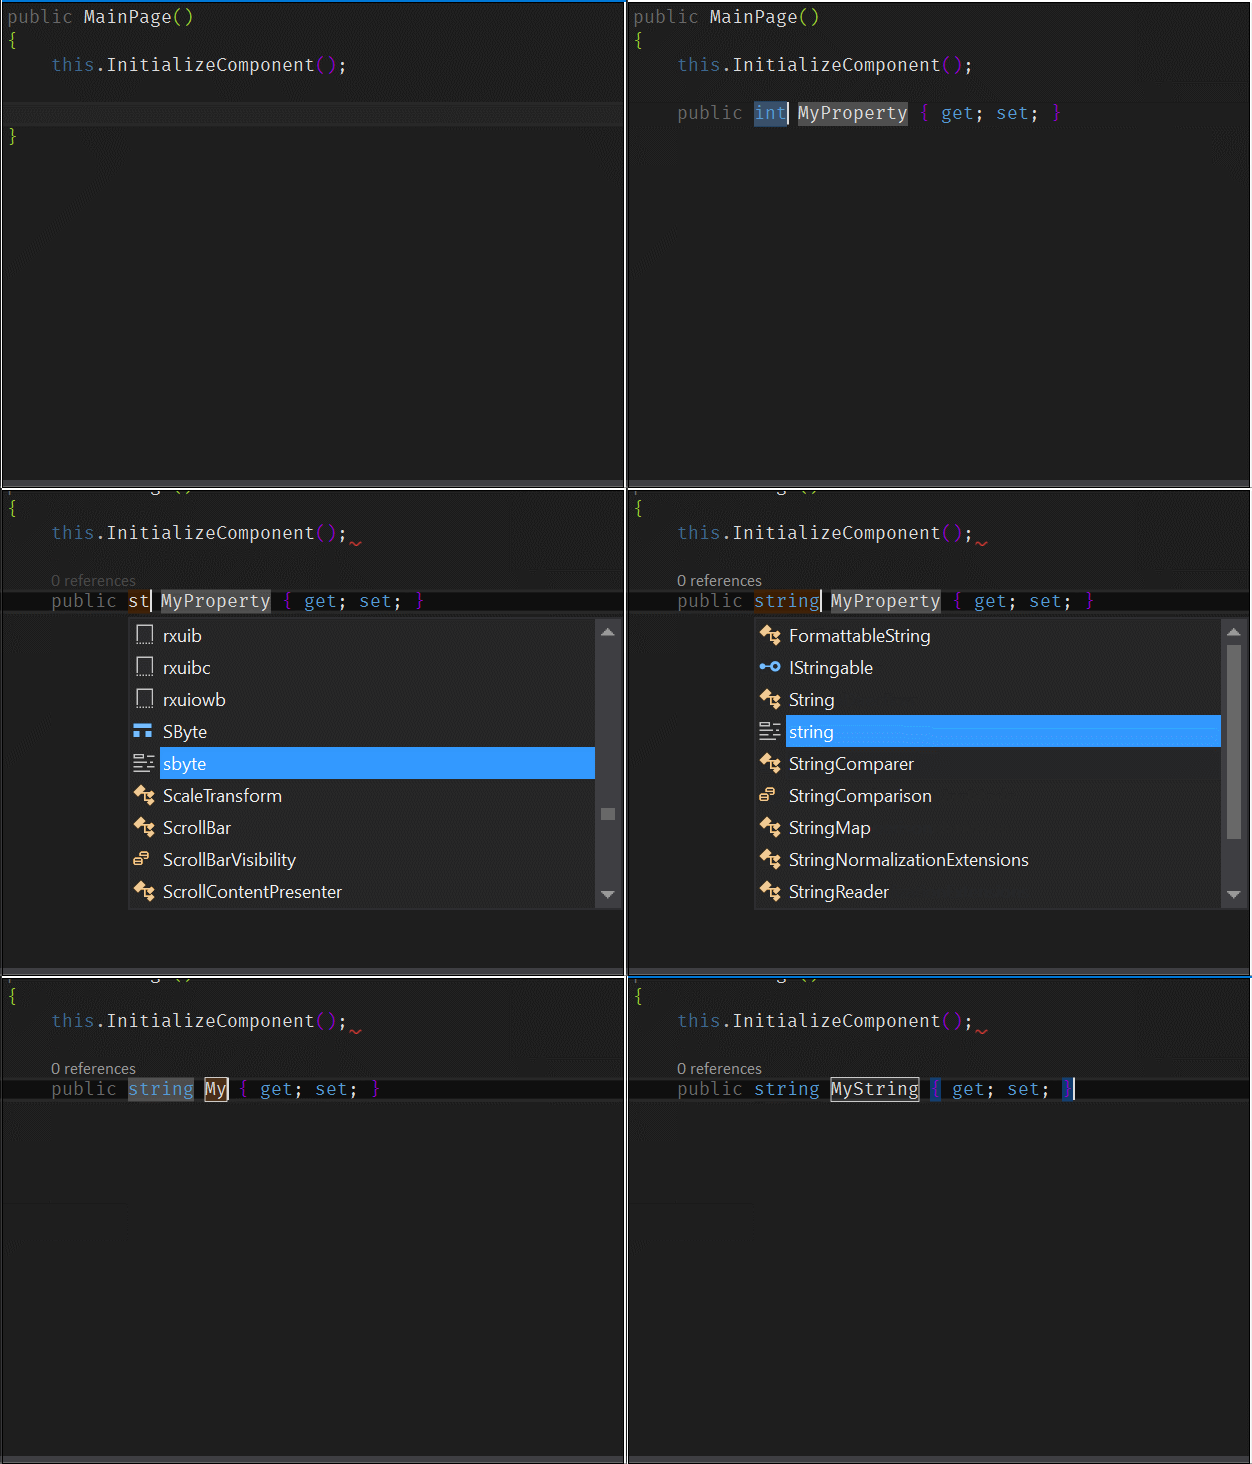
Typing prop and double tapping Tab will insert a standard public property. You will be asked to set the type and name of the property by hitting Tab to cycle through each part to be edited. When you’re finished, hit Enter to confirm.

Adding your own
While Visual Studio has the basics built in, you’ll want to make your own soon after starting to use snippets. You’ll quickly find code that you type often and want to make into a snippet.
Snippets are defined in XML documents and you tell Visual Studio where to find them. The following code…
private string myString;
public string MyString
{
    get { return myString; }

    set
    {
        if (value != myString)
        {
            myString = value;
            PropertyChanged?.Invoke(this, new PropertyChangedEventArgs(nameof(MyString)));
        }
    }
}
… will be inserted by the following XML:
<?xml version="1.0" encoding="utf-8"?>
<CodeSnippets xmlns="http://schemas.microsoft.com/VisualStudio/2005/CodeSnippet">
    <CodeSnippet Format="1.0.0">
        <Header>
            <SnippetTypes>
                <SnippetType>Expansion</SnippetType>
            </SnippetTypes>
            <Title>Property with INPC</Title>
            <Author>Jon Stødle</Author>
            <Description>Inserts a property which implements INotifyPropertyChanged</Description>
            <HelpUrl></HelpUrl>
            <Shortcut>propc</Shortcut>
        </Header>
        <Snippet>
            <Declarations>
                <Literal Editable="true">
                    <ID>type</ID>
                    <ToolTip>Type of property</ToolTip>
                    <Default>string</Default>
                    <Function>
                    </Function>
                </Literal>
                <Literal Editable="true">
                    <ID>backingField</ID>
                    <ToolTip>Name of backing field</ToolTip>
                    <Default>myBackingField</Default>
                    <Function>
                    </Function>
                </Literal>
                <Literal Editable="true">
                    <ID>propertyName</ID>
                    <ToolTip>Name of property</ToolTip>
                    <Default>MyProperty</Default>
                    <Function>
                    </Function>
                </Literal>
            </Declarations>
            <Code Language="csharp" Delimiter="$"><![CDATA[
                    // Insert code block from below here
                $end$]]>
            </Code>
        </Snippet>
    </CodeSnippet>
</CodeSnippets>
The top of the document has the author and a description of the snippet, but here are the more important of the tags:
- SnippetType explains the type of snippet to Visual Studio. Expansion means it’ll “expand” to more code
- Shortcut this is the sequence of characters to be entered to execute the snippet
- Declarations contains a list of the parts of the snippet that can be edited.
- Literal describes a part of the code that can be edited. The
IDis the name of the part (has to be unique). TheTooltipwill be shown when snippet is highlighted and should contain a short description.Defaultis the default value before editing. - Code this contains the code to be inserted. The keywords from the previous list is placed where the editable parts are. The keywords are surrounded by dollar signs. The $end$ keyword signifies the end of the code to be inserted. This is necessary to prevent Visual Studio from inserting an extra newline at the end.
It’ll end up working like this:

Adding them to Visual Studio
To easily sync the snippets across your development machines you can use something like OneDrive or Dropbox. I’ve made a git repo that I clone onto the machines I develop on.
To make the snippets available in Visual Studio you’ll have to tell it where to find them:
- Open Visual Studio
- Go to Tools > Snippets manager
- Select CSharp from the list of languages
- You’ve got two choices here:
- Import: you’ll select snippet files and Visual Studio imports/copies them into it’s store of snippets
- Add: you’ll select a folder and Visual Studio will add that folder to the folders it checks when looking for snippets (Visual Studio does not copy the files)
- Snippets are now ready for use
My preferred method is to add the folder where I store my snippets. It’s easier to keep them synced, and I can edit the snippets and have the changes instantly available in Visual Studio.
Wrapping up
After I first discovered snippets, and especially when I learned how to make my own, I’ve been loving them. I believe it’s one of the neatest features in Visual Studio, and I don’t think it’s very known or very appreciated. I hope I’ve convinced you to start using snippets. Even if you don’t make your own, the default ones are a lot of help too.
Happy snippeting 😛